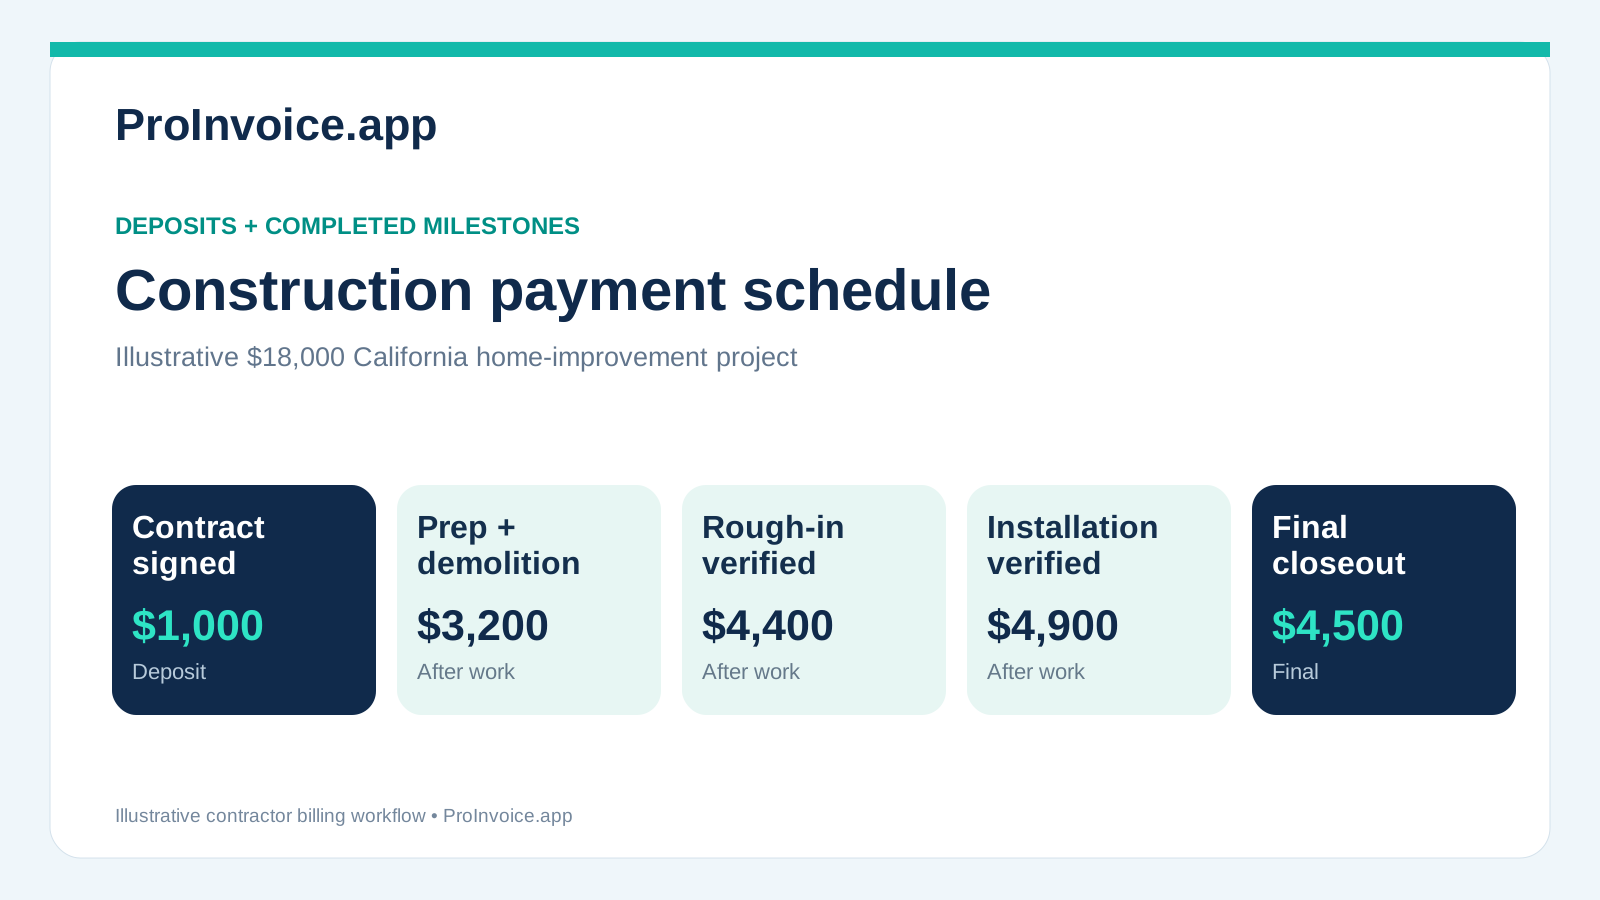
A customer approves an $18,000 remodel. The contractor needs to buy materials, pay the crew, and keep the job moving. The homeowner wants assurance that each payment corresponds to real progress. A construction payment schedule with a deposit and milestones gives both sides a written answer to the same questions: How much is due, what must happen first, and what balance remains?
The short answer: Set out the total contract price, any lawful initial deposit, each objectively verifiable work milestone, the dollar amount due after that milestone, the payment deadline, and the final closeout conditions. Make the payments add up exactly to the agreed price. Put the schedule in the signed contract before work begins and update it through properly authorized change orders—not informal invoice edits.
This guide uses a hypothetical $18,000 California home-improvement project, explains why the deposit is $1,000 rather than 10%, and gives a reusable schedule you can adapt. Laws and financing requirements differ by location and project type; review the rules for your specific job.
What belongs in a contractor payment schedule?
A payment schedule is the agreement about when money becomes due; a progress invoice is the later request for the amount due after a specified event. Keeping them separate matters. Sending an invoice does not prove the work milestone was reached, and a planned milestone does not prove a payment was collected.
Include these details in a schedule attached to the contract:
| Field | What the customer should see | What the contractor needs to track |
|---|---|---|
| Project and parties | Job address, customer, contractor, contract reference | Matching job/estimate ID |
| Agreed price | Total including all agreed work | Baseline amount before later changes |
| Initial deposit | Amount and the lawful trigger for collection | Date received and payment reference |
| Each milestone | Precisely completed work or materials delivered | Photos, delivery records, inspections, signed acceptance when applicable |
| Payment amount | Exact dollar value, not just a percentage | Invoice number, due date, received amount |
| Changes | How approved additions or credits affect the schedule | Signed change order and revised balance |
| Final payment | Completion and closeout requirements | Punch-list, final walkthrough and other contract conditions |
Be specific. “Second payment next Friday” is a weak trigger when the drywall has not been installed. “Second payment once rough plumbing and electrical work is completed and required rough inspections pass” is verifiable. Include a contractual due period after a verified milestone, as appropriate; a due date alone is not a substitute for completing the agreed work.
The payment schedule is part of a broader contract. It does not replace the scope of work, start and completion terms, insurance and licensing details, required notices, change-order provisions, or any lender documentation.
First calculate a deposit the law allows
There is no single legal deposit percentage for every construction job in the United States. Residential home-improvement limits can be materially different from commercial or new-construction rules, and some jurisdictions regulate the timing of subsequent progress payments too.
California example: The California Contractors State License Board (CSLB) states that for a covered home-improvement contract, the usual maximum down payment is the lesser of $1,000 or 10% of the contract price, subject to limited exceptions. The rule is not an invitation to charge 10% on every California project; special-order materials do not create a general exception. The CSLB also explains that progress payments cannot exceed the value of work performed or materials delivered, apart from the allowed down payment. See the CSLB's home-improvement contract guidance.
For the example project:
- Contract price: $18,000.
- Ten percent: $1,800.
- Dollar cap: $1,000.
- Ordinary maximum initial down payment for this covered California project: $1,000.
- Remaining scheduled amount: $17,000.
For a different project in a different state, check the applicable statute, contract requirements, type of work, financing rules, and any applicable bonding exception. Do not borrow a deposit amount from a generic template without checking it.
A complete $18,000 milestone payment schedule
Assume a small fixed-price kitchen refresh in California, with cabinet and countertop installation, minor approved electrical/plumbing rough-in work, and a final walkthrough. The following amounts are illustrative allocations, not market prices or a legally approved form. A real contractor must allocate milestones to the actual value of work and delivered materials at each stage.
| Event | Objective payment trigger | Payment due | Cumulative scheduled payments | Balance after payment |
|---|---|---|---|---|
| 1. Initial deposit | Signed agreement; subject to applicable deposit law | $1,000 | $1,000 | $17,000 |
| 2. Preparation and demolition | Agreed demolition, disposal, and specified preparation completed; materials listed for this stage delivered | $3,200 | $4,200 | $13,800 |
| 3. Rough-in milestone | Contracted plumbing/electrical rough-in finished; required inspection or agreed verification completed | $4,400 | $8,600 | $9,400 |
| 4. Installation milestone | Specified cabinets, countertops and finishes installed to the contract's stated milestone criteria | $4,900 | $13,500 | $4,500 |
| 5. Final completion | Remaining scope and agreed punch list completed; required closeout/inspection conditions met | $4,500 | $18,000 | $0 |
| Total | $18,000 |
Math check: $1,000 + $3,200 + $4,400 + $4,900 + $4,500 = $18,000. The amount remaining after the deposit is $17,000. After stage three is paid, the unpaid balance is $9,400.
A crucial second check is value-in-place, not just arithmetic. For this schedule to be appropriate under the California rule, the contractor must be able to show that the value of work performed and materials delivered supports the cumulative progress payment requested. Do not assume the exact illustrated distribution will fit every job. Revise the milestones when the actual scope, material delivery sequence, or legal requirements make them unsuitable.
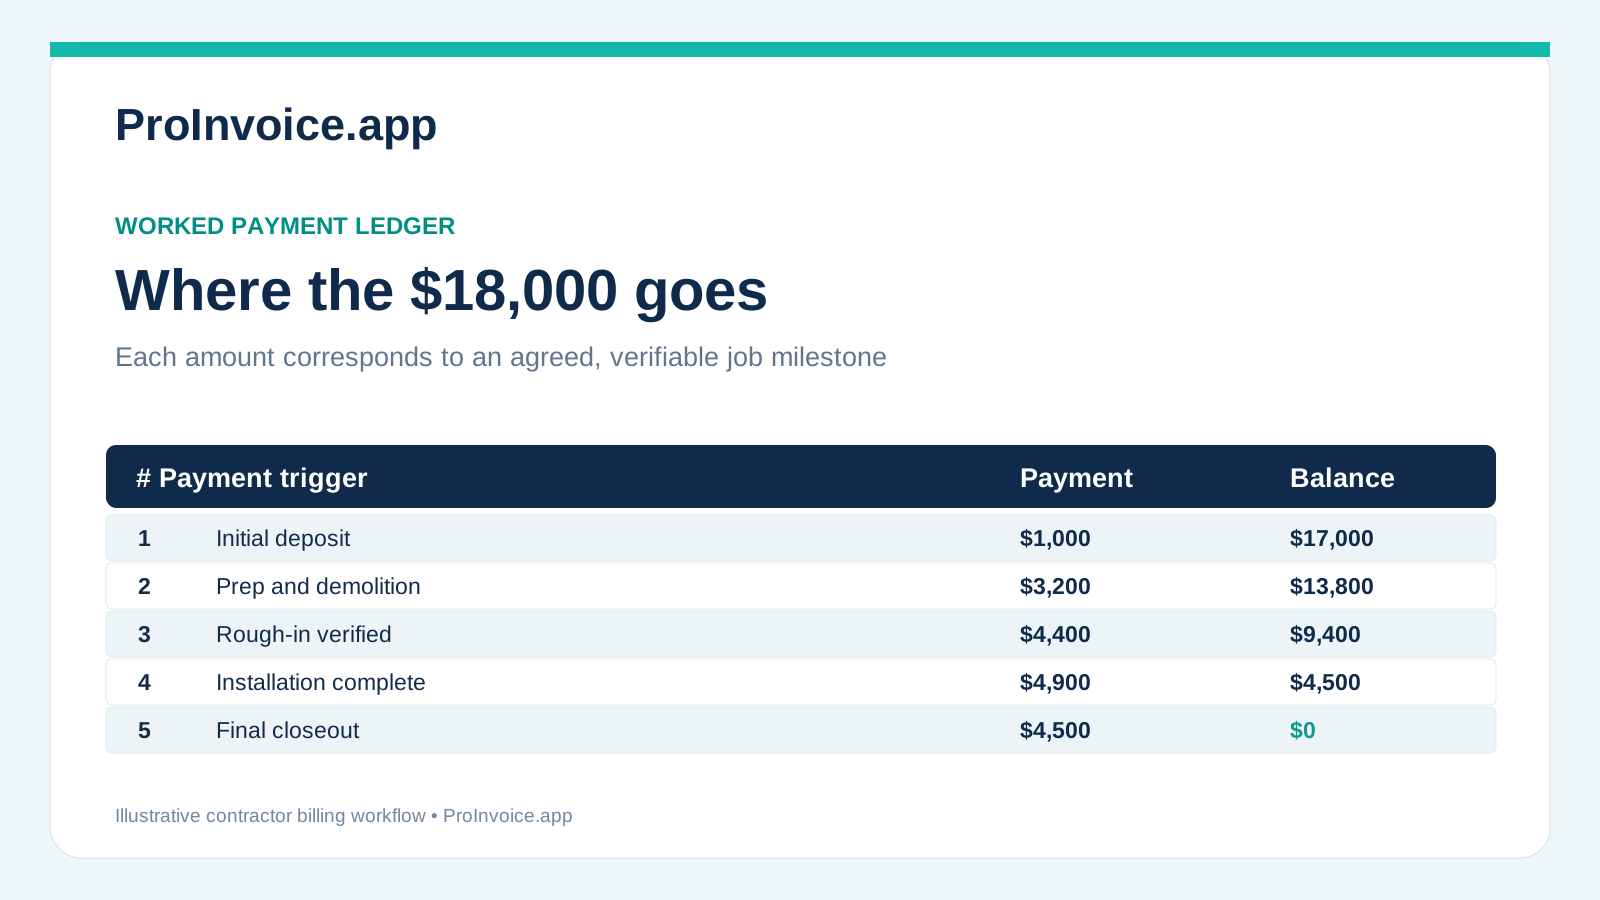 Example only: A final $4,500 balance remains after the fourth payment event.
What if a customer pays only part of a milestone invoice?
Suppose stage three is complete and the customer is invoiced for $4,400, but pays $2,000. Record the milestone as complete, the invoice as partially paid, and $2,400 as still outstanding on that invoice. Don't mark the $4,400 event fully paid or silently roll the missing amount into a later invoice without a clear ledger.
At this point, the total received is $1,000 + $3,200 + $2,000 = $6,200. Against the original $18,000 contract, $11,800 remains unpaid, including the unpaid portion of stage three and future milestones. Those are two different views: overdue or due now and contract balance not yet due.
For a broader explanation of keeping prepayments visible when invoicing, see how to show a paid deposit on the final invoice.
How to build the schedule before sending an estimate
Step 1: Start with the contract scope, not a convenient percentage
List exactly what will be delivered: demolition, framing, equipment, specialty materials, inspections, installation and punch-list work. Price the work based on actual supplier quotes, labor, subcontracting, overhead and margin. Percentages can help summarize a final schedule, but they should not dictate payment before the work exists.
If a $4,900 installation draw cannot be supported by the value of work completed or delivered, break it into clearer stages or adjust the amount. A pretty pie chart will not make a front-loaded draw lawful.
Step 2: Choose proof that the milestone happened
Choose evidence that matches the work. For a plumbing repair, completed test results and dated photos may be enough under the contract. For a remodel requiring inspections, use the appropriate inspection record. For ordered cabinets, keep delivery documentation and make sure the payment trigger actually complies with the applicable law and contract.
Avoid vague labels such as “halfway done.” If work has been completed but a customer is out of town, specify a reasonable verification and payment process in the written contract rather than improvising one afterward.
Step 3: Write the exact amount and payment terms
Every event should have a specific amount, a trigger, and an agreed payment deadline. Verify that the schedule totals the contract price. Do not include a payment processor fee or late charge unless it is properly disclosed and allowed; fee rules differ by payment method and jurisdiction.
Step 4: Check legal requirements and financing rules
For California home-improvement work, compare the schedule with the CSLB's requirements for written contracts, down payments and progress payments. If the project uses a lender or a construction draw facility, request its required inspection, pay-application, waiver and documentation process before writing your schedule.
Step 5: Have the customer approve the written agreement
Present the milestone schedule alongside the estimate or contract before work starts. Ask the customer to review both the dollar figures and the descriptions of completed work. Keep the accepted copy and subsequent changes in the job record.
Step 6: Invoice only after the agreed trigger is met
Document completion, confirm the milestone is actually due, issue the corresponding invoice, then reconcile the payment. Payment initiated, payment successful, and bank payout are not interchangeable statuses. If you're collecting online, allow for processor timing; don't promise that card funds arrive in the bank instantly.
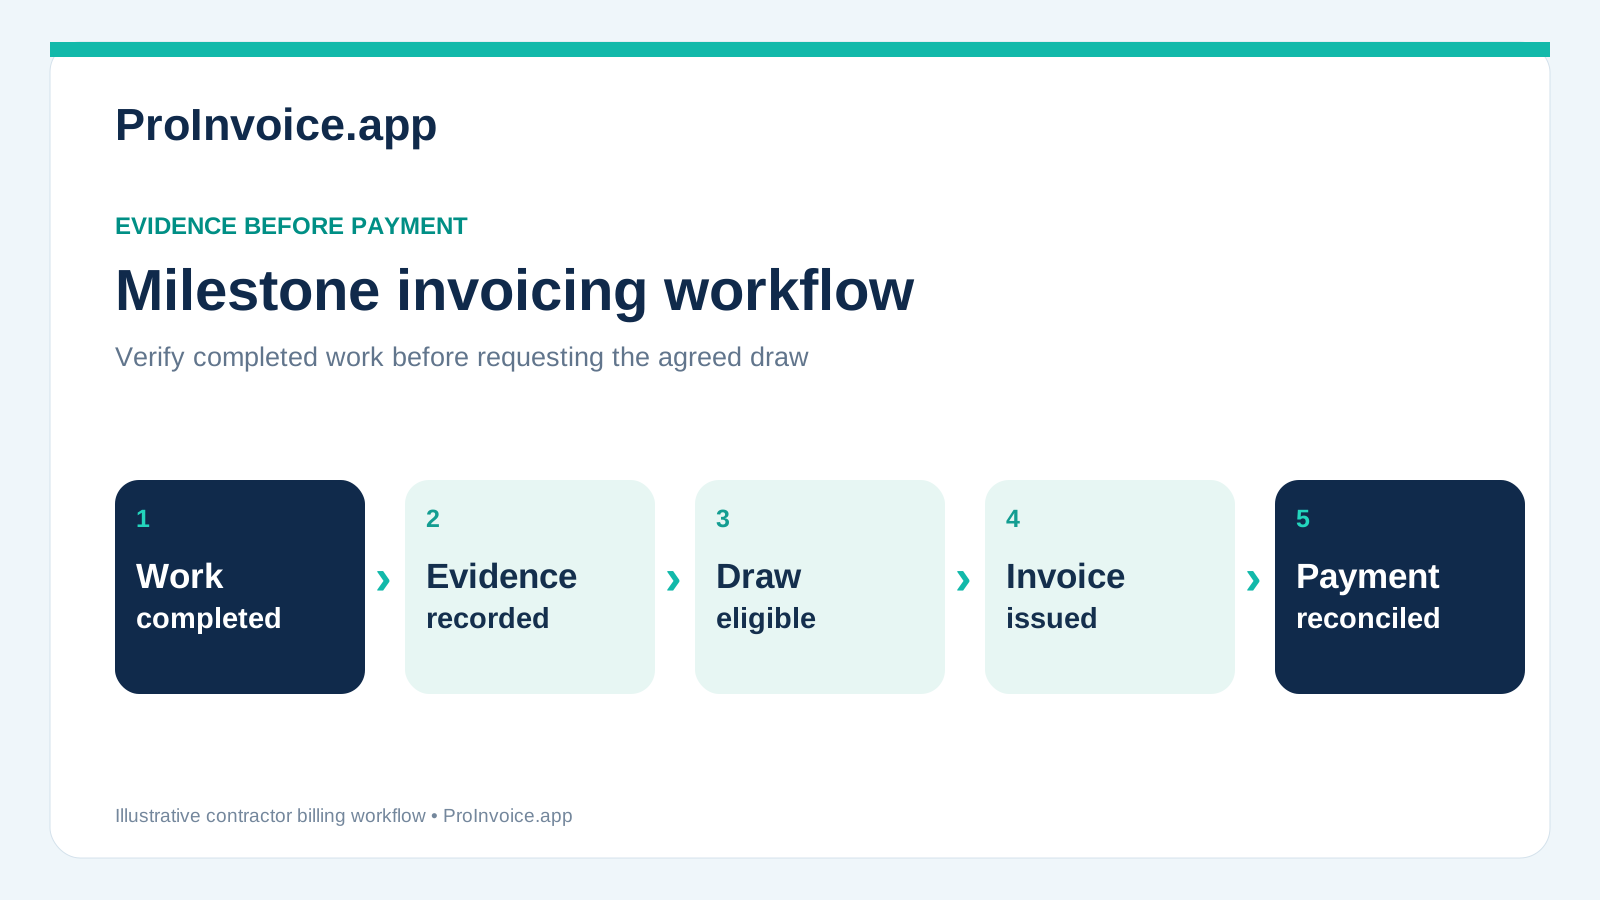 Operational safeguard: evidence and eligibility come before the invoice; reconciliation comes after payment.
Use the right schedule for the type of project
| Project type | Often suitable approach | Watch out for |
|---|---|---|
| Short repair | Lawful deposit, if any, then completion payment | Unnecessary mid-job draws for one-day work |
| Kitchen or bathroom remodel | Clearly defined phase-completion payments | Collecting more than completed value where prohibited |
| Multi-month residential construction | Detailed milestones, inspections and closeout | Confusing calendar dates with work completion |
| Commercial subcontract | Contract-specific progress applications and retention | Pay-if-paid wording, waiver conditions, owner and GC requirements |
| Maintenance service | Per-visit or recurring invoices as agreed | Treating service subscriptions as construction draws |
A milestone schedule is not automatically better than every other method. For a short service visit, one final invoice may be simplest. For large commercial jobs, a schedule of values and formal applications for payment can be more appropriate. Procore's contractor payment schedule guide explains how progress billing, time-based arrangements and retainage differ.
What to do when the job changes halfway through
A payment schedule is a baseline, not a license to keep sending the original amounts after the scope changes. Customer upgrades, concealed conditions, substitutions, credits, and delays can change what is owed or when a milestone can be certified.
Example: The customer requests an additional $900 of lighting work. If the parties validly approve a written $900 change order and the schedule is revised to include it, the contract amount becomes $18,900. The original $1,000 deposit remains separately recorded; do not assume a new or larger deposit can be collected simply because the price increased. Assign the added work to an appropriate approved milestone, then recalculate the remaining contract balance.
If the customer removes $600 of originally planned work, the approved reduction should be shown just as clearly. An already-collected amount may need credit or refund treatment based on the agreement and law. Keep a separate ledger so you do not bill the customer twice or lose the record of an agreed credit.
For California covered home-improvement contracts, the CSLB says contract price or scope changes require a written change order signed by both parties before the change. The CSLB's contract guidance explains this safeguard. See also ProInvoice's change-order management overview and its estimate-to-invoice workflow guide.
Keep the original, the approved change and the invoice connected
Maintain four separate numbers: original contract amount, net approved change orders, total payments received, and remaining amount. A simple reconciliation is:
Revised contract price = original contract price + approved additions − approved credits.
Remaining amount = revised contract price − payments already received.
The remaining amount is not all immediately due; it is a contract ledger balance. Invoice due dates must still follow the approved milestone schedule and applicable rules.
Common payment-schedule mistakes
- Using the same 10% deposit everywhere. California's covered home-improvement rule applies a $1,000 ceiling when that is lower than 10%, subject to narrow exceptions.
- Making the calendar the only trigger. Actual completion or delivery requirements still matter.
- Requesting payment for unordered or undelivered materials. Material ordering by itself does not mean a progress draw is permissible under the California rules described above.
- Changing an accepted price without documentation. Get the required approval before performing the change.
- Mixing up invoiced and collected amounts. Track unpaid milestones separately from future milestones.
- Forgetting retainage or lender procedures. If a contract requires retainage, show it as a separate withheld amount, not as payment received.
- Publishing a template without checking the totals. A $500 mismatch creates a real billing dispute, even when all the wording is good.
- Closing a job while payment is merely processing. Reconcile the invoice, processor transaction and bank payout separately.
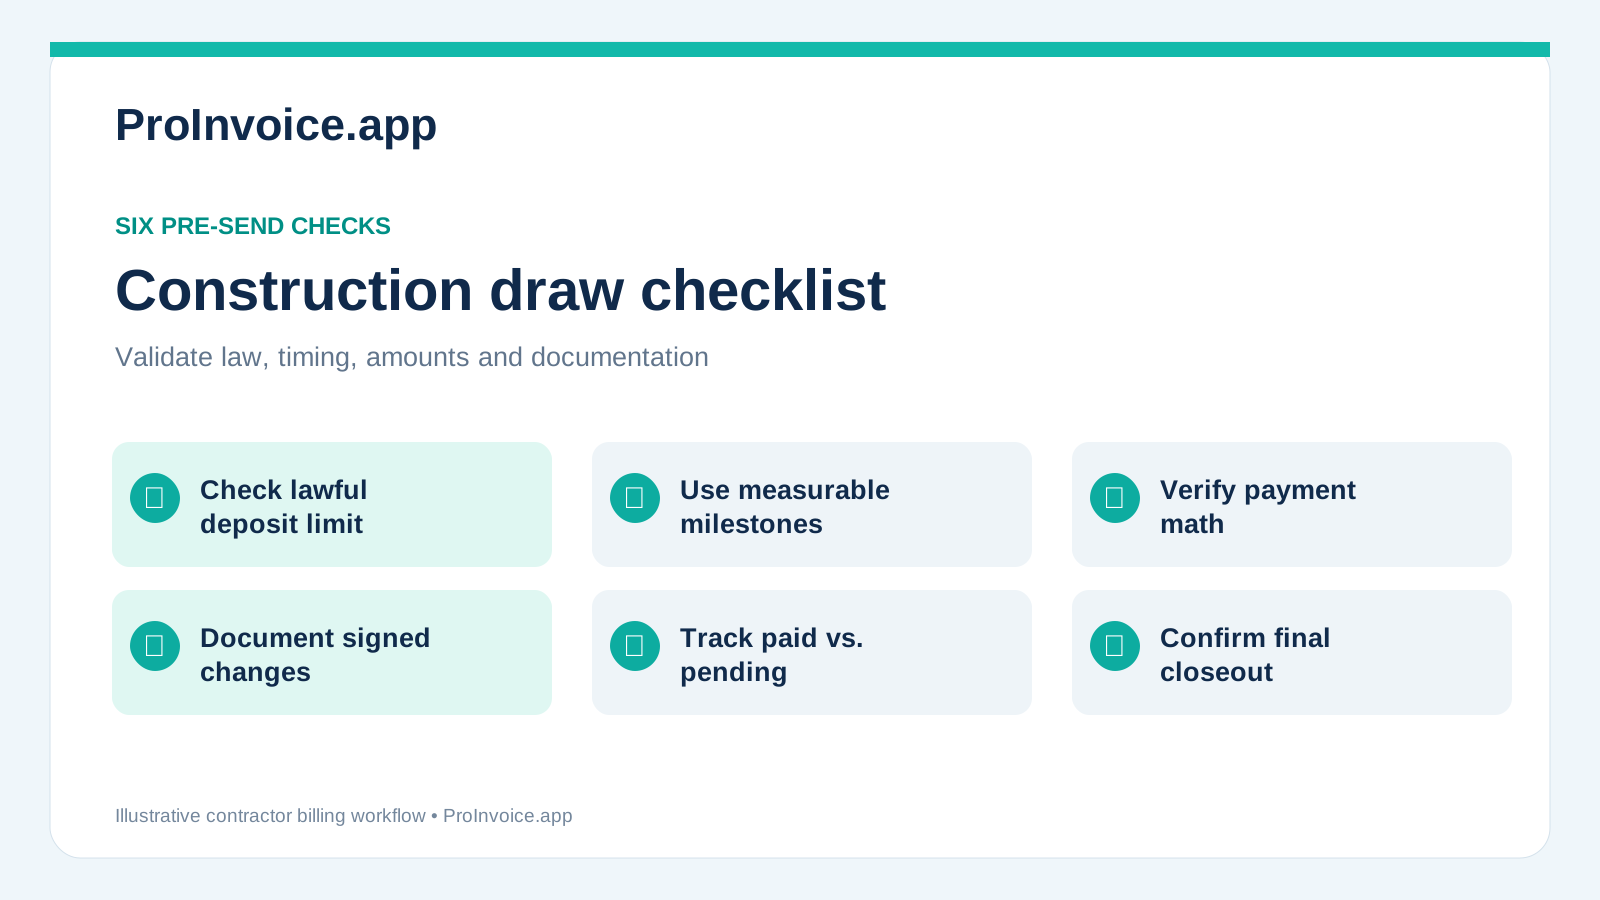 Before sending: six checks that protect the customer and your receivables.
A copy-ready payment schedule outline
Use the following as a drafting worksheet, not a complete legal contract. Obtain qualified review for the relevant state and project type.
Project: [address and description]
Contract reference: [number]
Customer / contractor: [names]
Agreed original price: $[amount]
Initial deposit: $[amount], subject to applicable law
Milestone A: [specific completed work and proof] — $[amount], due [agreed terms after qualifying completion]
Milestone B: [specific completed work and proof] — $[amount], due [terms]
Milestone C: [specific completed work and proof] — $[amount], due [terms]
Final milestone: [completion, inspection and closeout trigger] — $[amount]
Total scheduled: $[must equal agreed price]
Changes: [reference governing change-order clause; record approved changes in writing]
Approval: [signatures and dates as required]
Compare the draft with the CSLB's official contract information if you work on covered California home improvements. The exact contract requirements are broader than the payment fields shown above.
Frequently asked questions
Should a construction deposit be 10%, 20%, or 50%?
There is no universal answer. Use the deposit amount permitted for the location and contract type. On ordinary covered California home-improvement contracts, the general maximum is the lesser of 10% or $1,000, subject to limited exceptions; a blanket 20% or 50% upfront request would not be compliant for such a contract.
When should a contractor send a milestone invoice?
When the payment event specified in the agreement has occurred and the amount is lawfully due. Keep evidence of completion and any required inspections or approvals. Sending the invoice is separate from confirming the customer's payment.
Does a deposit reduce the final invoice?
Yes, for an advance amount credited against the job price, record it as already paid so the customer is asked only for the unpaid balance, accounting for any properly approved changes. See the deposit-on-final-invoice example.
Can a customer pay a milestone by card or ACH?
That depends on the contractor's checkout setup and the customer's available methods. Payment method choice does not change the underlying contract trigger. Online card or bank payments can also have different fees, dispute rules and payout timing.
Are milestone schedules and retainage the same thing?
No. A milestone schedule specifies when a draw becomes due. Retainage is an amount withheld from an otherwise earned draw until the contractual release conditions are satisfied. Not every residential contract uses retainage, and laws and contract terms vary.
What if the client asks for extra work after accepting the schedule?
Describe the requested change, agree on the new price and timing, obtain the legally required written approval, and update the ledger and affected milestone. Don't erase the original signed amount or charge for unapproved work.
Next steps: make the written schedule usable on the job
Build your schedule from real work stages, check the applicable deposit cap, and ensure the numbers and proof requirements can be reconciled before anyone signs. Then use a consistent estimate template and invoice template to carry the agreed job details into customer-facing documents.
ProInvoice supports estimates, invoices, customer information, and online payment requests for eligible connected accounts. It is not a substitute for a signed construction contract or a legal-compliance review. If those workflows fit your work, compare the current plans and start from the agreement—not from a surprise final bill.